
This is the second part of the series of making a PowerPoint Presentation. In this tutorial, I will design a professional slide from scratch. Before beginning the tutorial let me show you the final slide with a different layout design.
1st slide has a black rounded triangle in 180 directions and on the left side nice Heading and Content with the button.
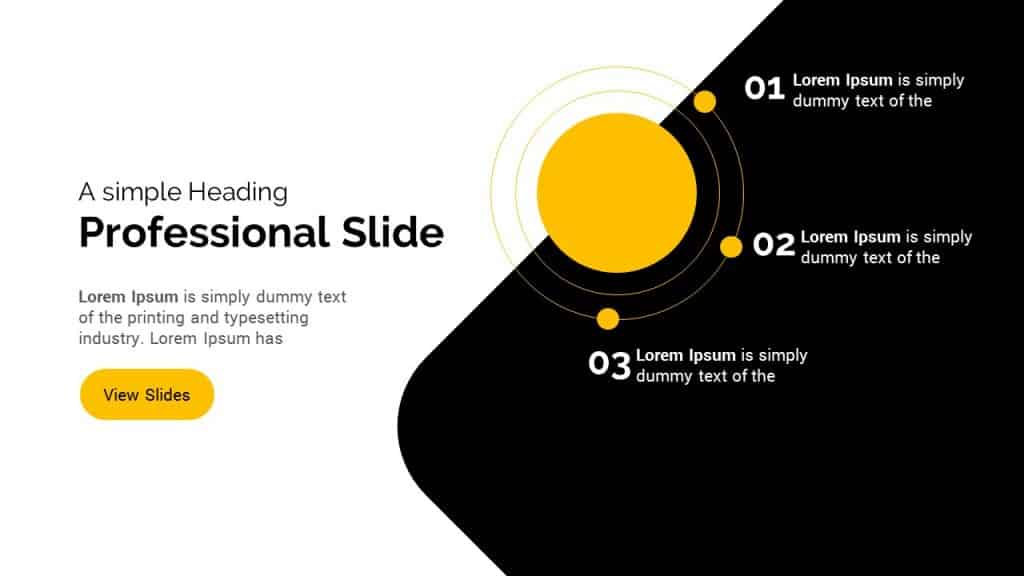
2nd slide has a background image with an overly yellow color with nice content on left. Post Comming Soon. you can watch the complete tutorial below.
3rd slide has an angle base image with edgy solid multiple colors. Post Comming Soon


Let's Start the tutorial from Scratch
Step: 1
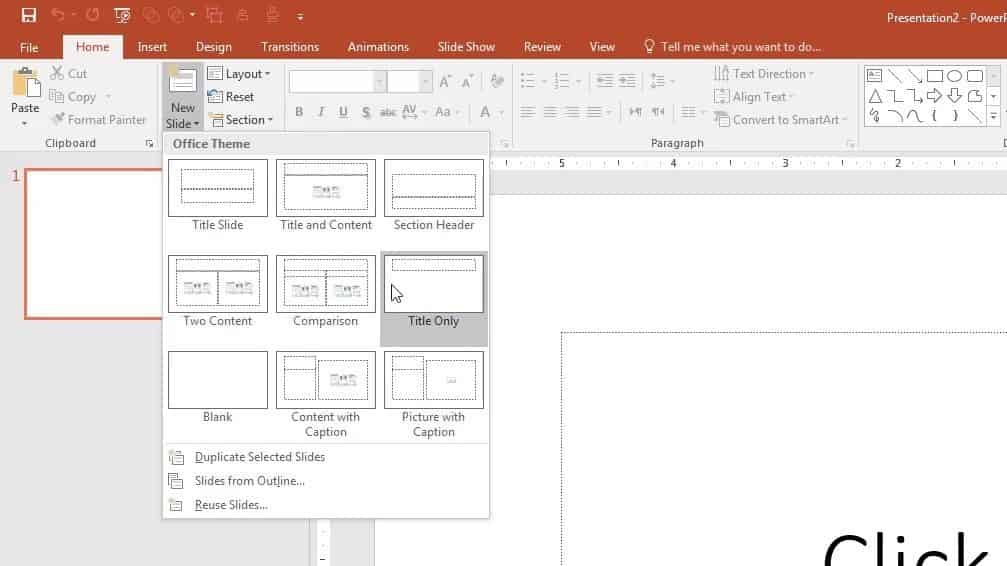
I will design all these slides from scratch. Let's start work on the first slide. Go to the File > click New and select blank presentation. In the slide, section create a new slide and select title only slide
Step: 2
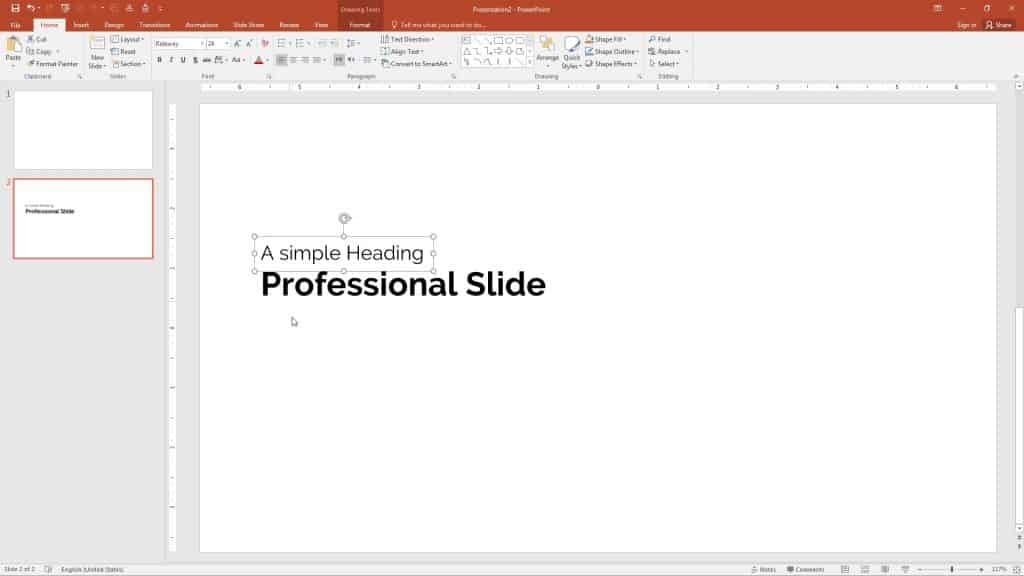
Select the heading and change font to Ralweay Bold and size to 40. Click in the text box and type "Professional slide" select the text from the top and move down to the near to center

Step: 3
Again duplicate the heading by a shortcut of CTRL+ D and move up to the main Heading and change the text to a "simple Heading". Reduce the font size to 24 and remove the bold from the heading.
Step:4
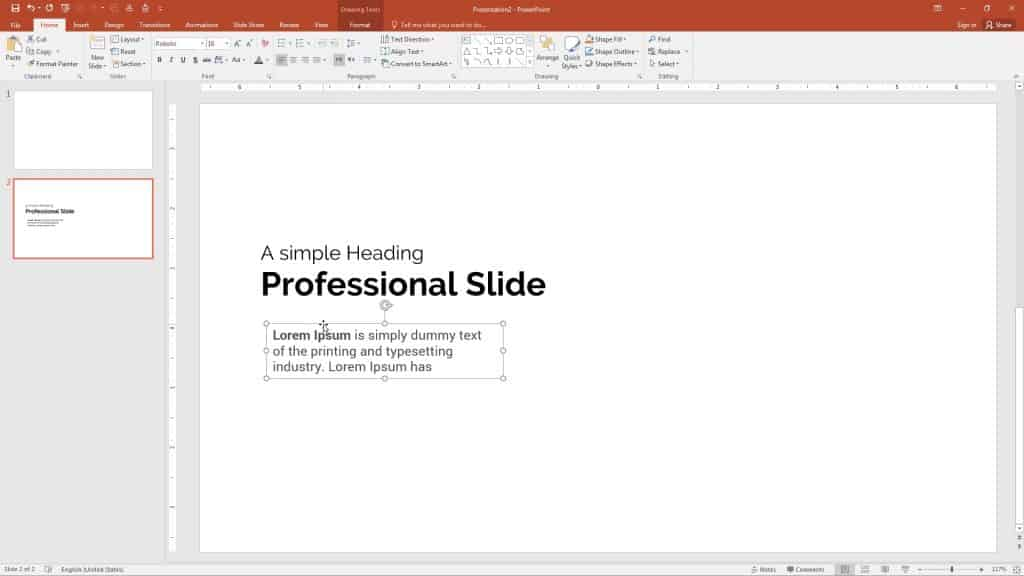
Add a small paragraph below the large heading so go to the Insert tab > text box. I am going to use dummy text in my content so you can use your own content.
The default content is Calibri so I want to change to it Roboto to select all and change to Roboto to decrease the font size to 16. Change the dark black to light black select the font and 35 percent lighter of black text
Step:5
Let's add a Rectangle on the right-hand side so go to the insert Tab > shapes select a round Rectangle and draw it. Rotate a bit
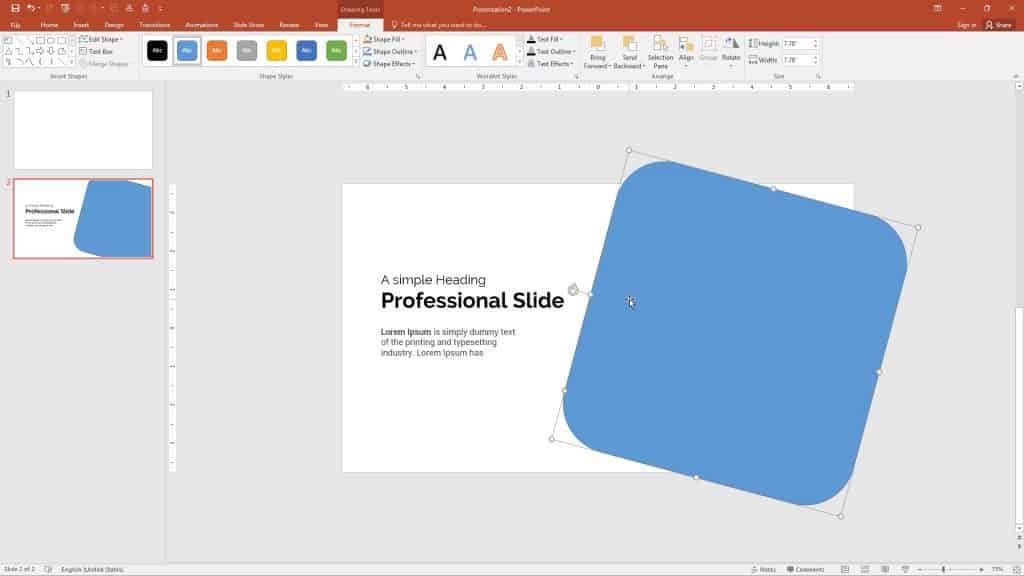
Step:6
Right-click on the rectangle and go to format shape click inside Sizes change of height to 7.58 and the width of the rectangle 10.58. rotation to 315 and in Properties change the horizontal position to 5.78 and the vertical position of the rectangle 0.7
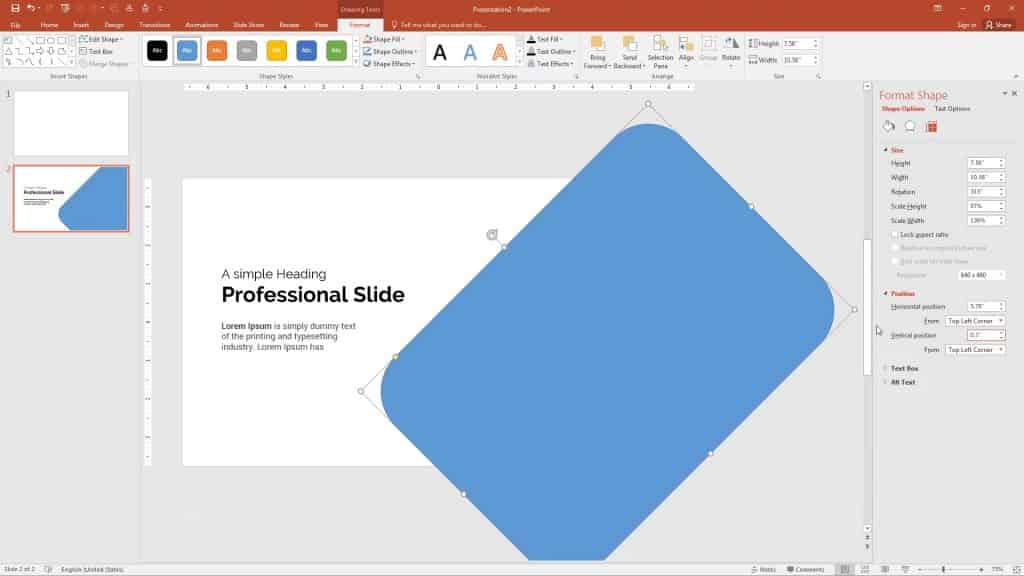
change the color to black remove the outline stroke
Step: 7
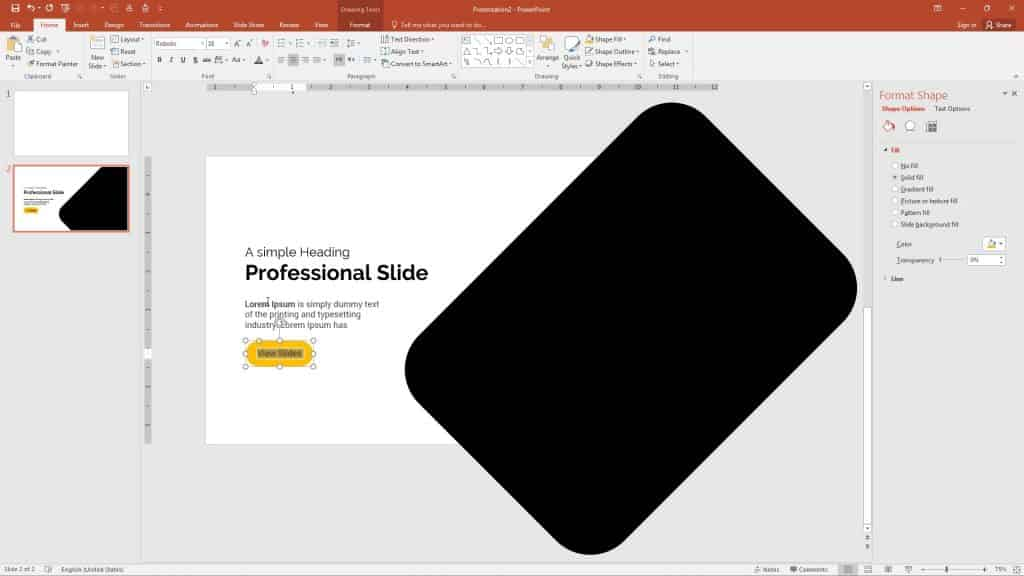
Add a button go to the Insert Tab > shapes and select again rounded rectangle draw it and it looks like a button increases the radius to full. the color of the button to Yellow. Remove the outline to no outline. Add the text in the button "View Slides" select all the text and change the color to black now change the font to Roboto default was Calibari move to 16
Step:8
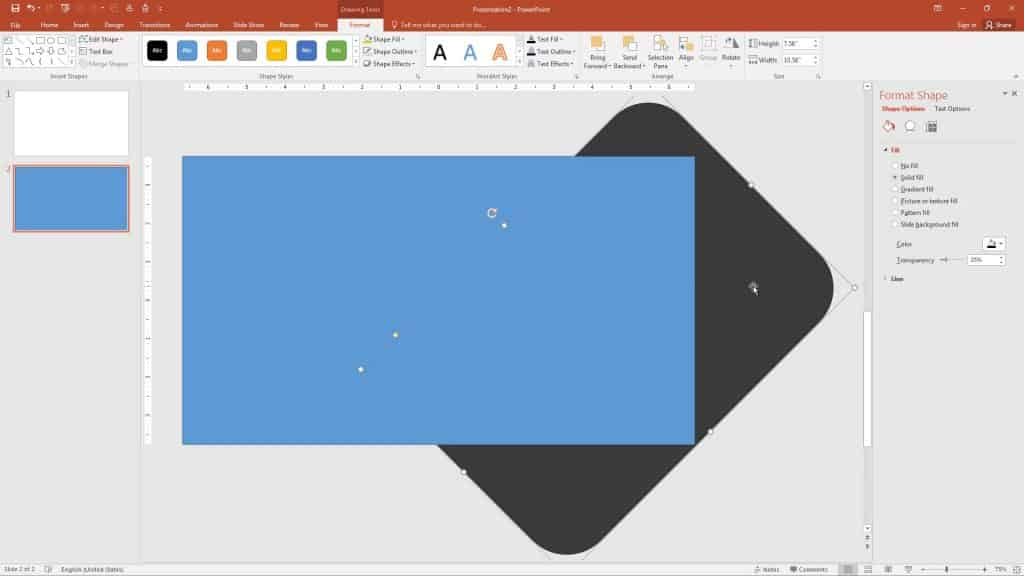
next, the rounded rectangle is very large I want to cut it and fit it into the slide so go to the Insert Tab > shapes and select rectangle starting from the top of the slide and fill it into the slide. Now I don't know where the slide ends so click on the rectangle and add small transparency
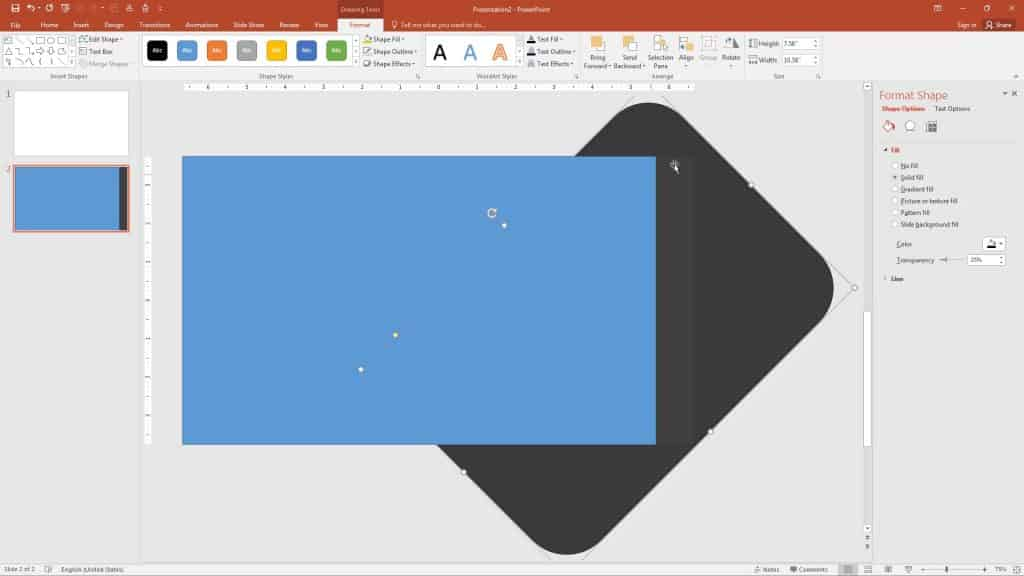
Step:9
now I want to see where the slide end selects the rectangle and fits it all into the slide. select both the rounded rectangle and the rectangle by holding of the shift key.
Step:10
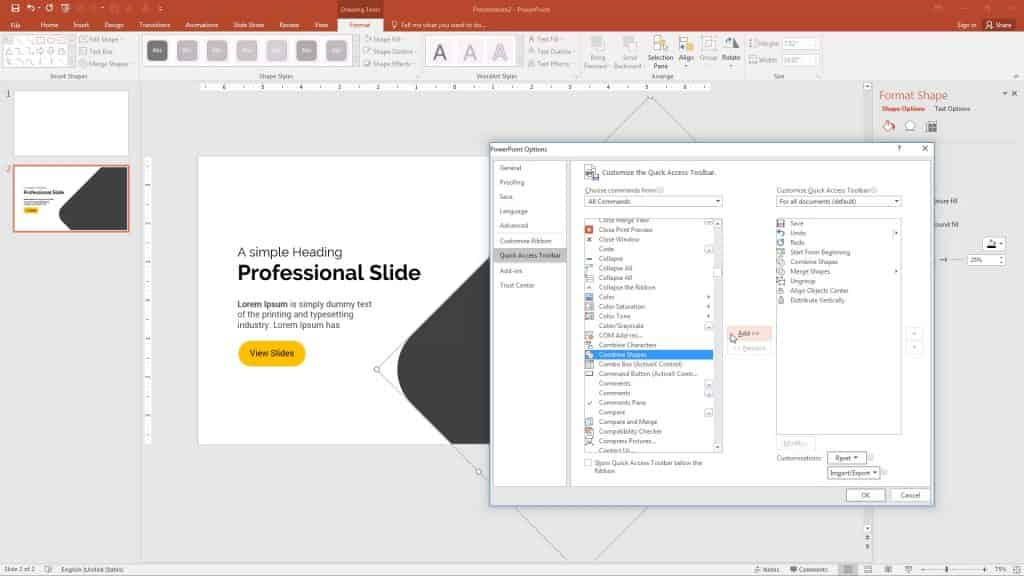
Removed the extra space of the rectangle and fit it into the slide I will show you how to add this intersection in the top of the bar so go to File > Options
in the access, toolbar and select all commands I have added combined shapes. Click on the left of the panel type the letter c and find the combined shape click > arrow to add then click okay.
Step: 11
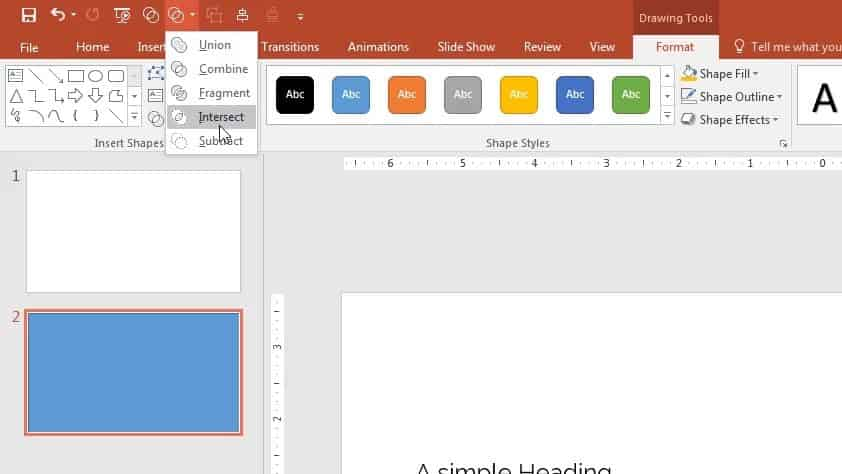
Select both of the Shapes and press hold of the keyboard shift key and click interset

Step:12
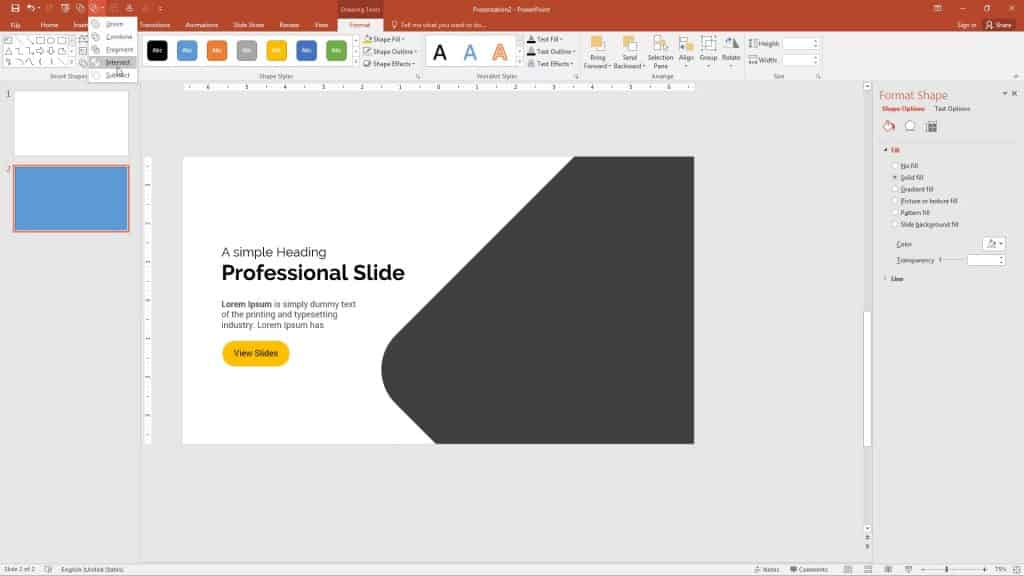
Now it intersected and change the transparency to zero.
Step:13
now add the circle on top of the Black rectangle let me show you go to the insert and click shapes and select oval shape draw it and change the color fill shape to orange remove the outline and like this one
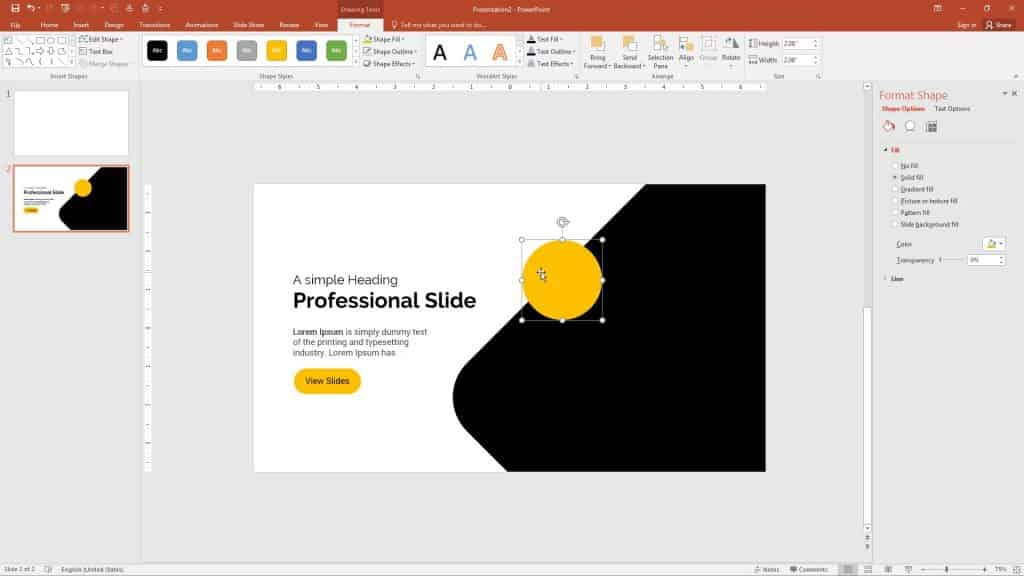
Step:14
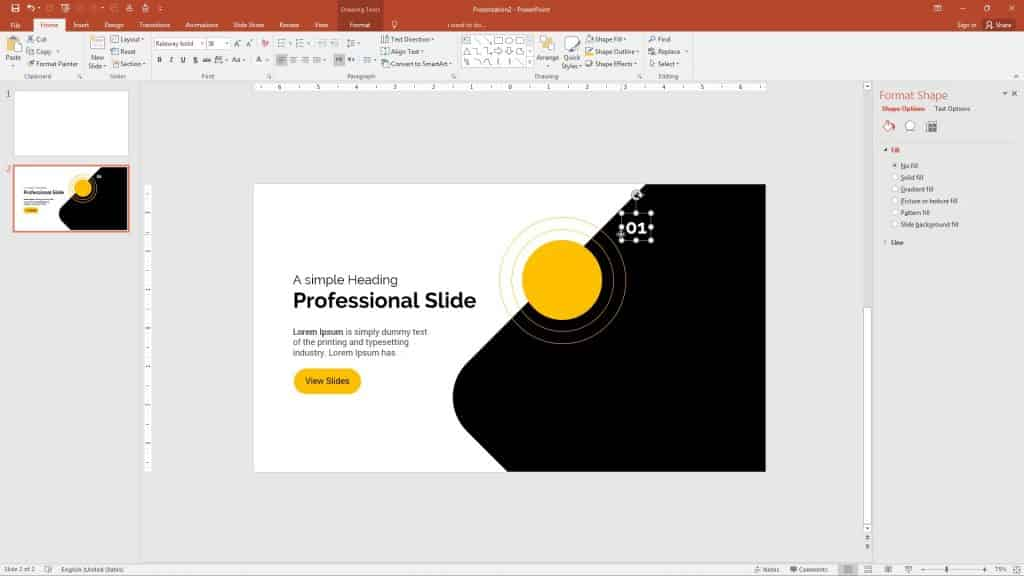
Duplicate the circle two times by Ctrl + D. Remove the fill color and add the stroke only. change Stoke color to an orange outline.

Step:15
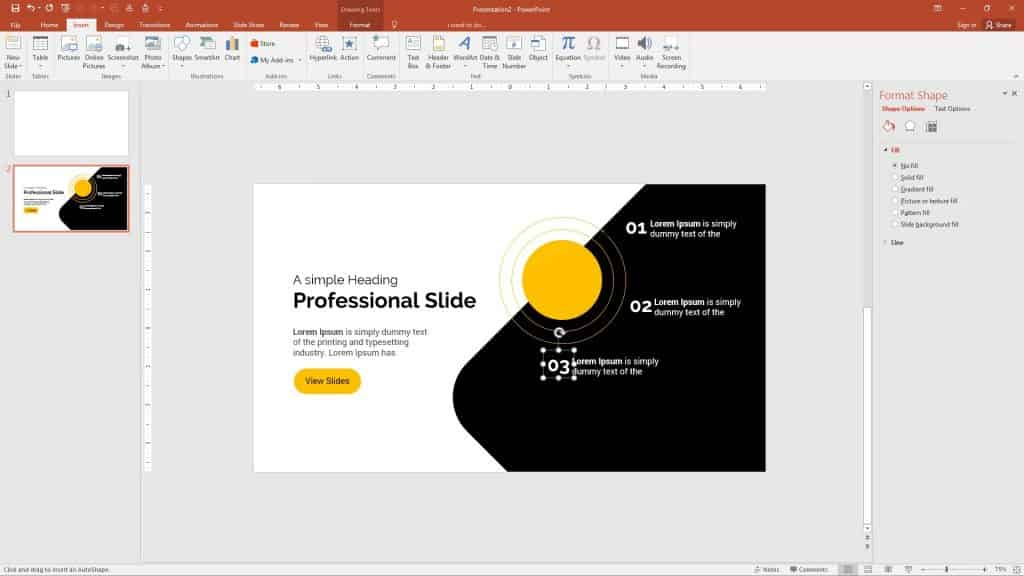
Next, add the three texts in a black rectangle on the right on side. Go to the Insert Tab> Text Box and click on the slide and type 01 and select the text and change to Raleway and turn bold and increase font size 36 change the color to white.
Step:16
Add a small "lorem ipsum" text like the content so I have duplicate lorem ipsum text on the left side and move to the right on 01 positions. this paragraph is very large so I will reduce it and turn it into a small paragraph and change the color to white

Step:17
Duplicate the 01 and content two times and align to circle
Step:18
Last, add a small circle in the numbers like a bullet so go to the insert and in shapes select oval draw a small circle and align it adjust it
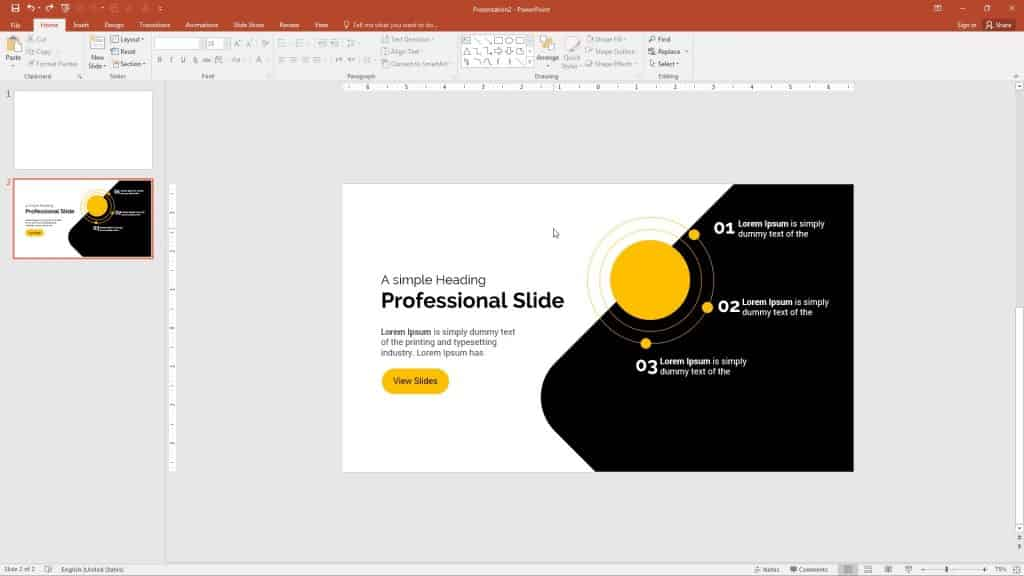
Here is the final Slide and watch the complete Tutorial video:
Thanks for the help
Dear Sir
I am very thankful to you, you knowledge and skills is highly appreciable.
Thank you.
Thanks